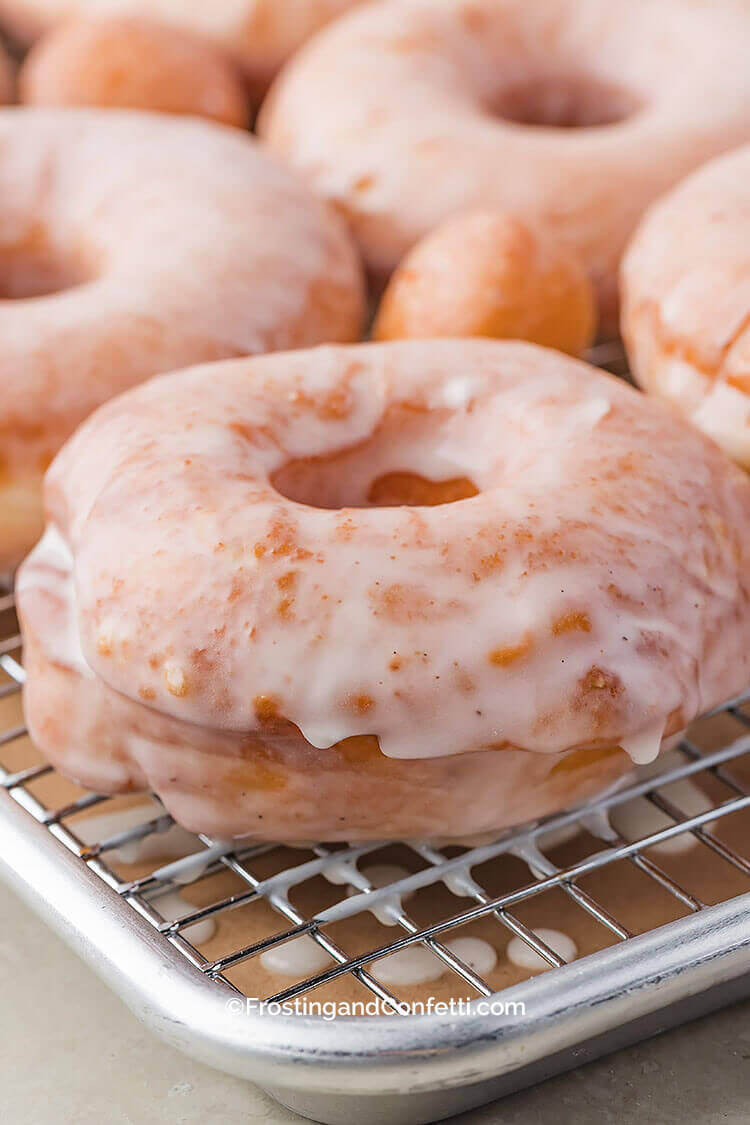
Soft, tender, and perfectly golden, these sourdough discard donuts use an overnight rise to develop flavor and create a dough that is much easier to handle in the morning.
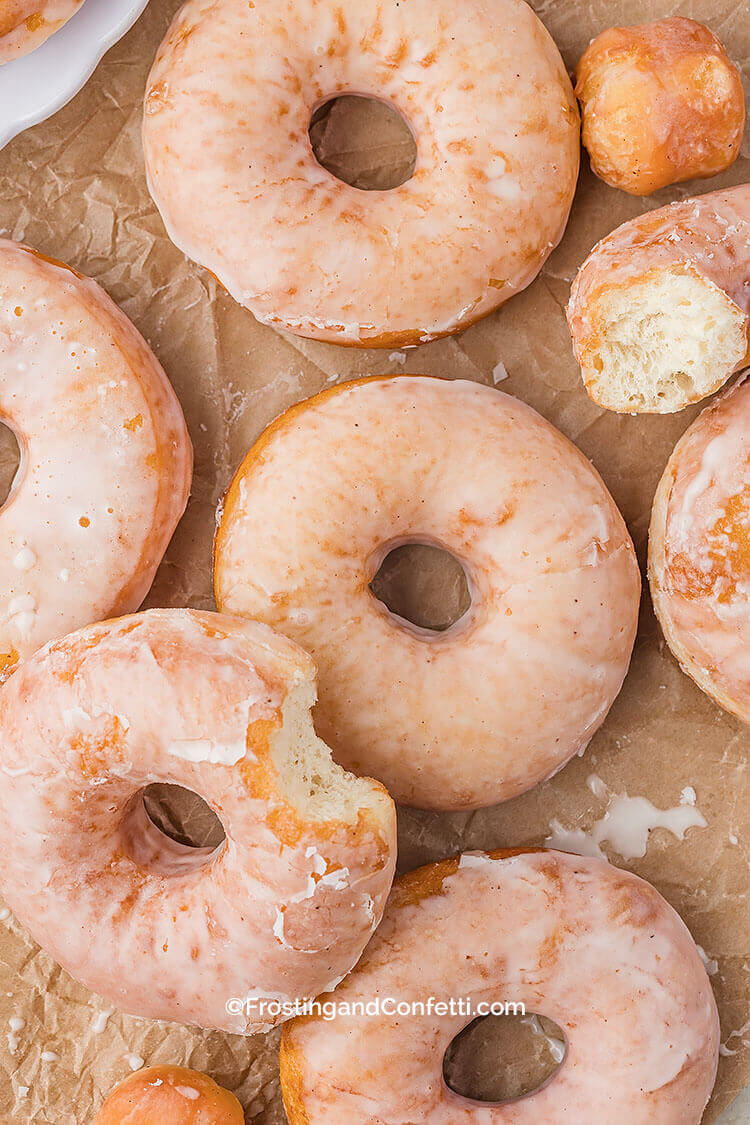
The long, chilled rest produces a lighter texture, a smoother dough, and a subtle tang from the sourdough discard. Finish with a classic vanilla or vanilla-bean glaze for a bakery-style look.
Ingredients You’ll Need
Donut Dough
- ½ cup (120g) whole milk, warm (about 100°F)
- ¼ cup (50g) granulated sugar
- 1½ tsp (5g) instant yeast
- ½ cup (120g) sourdough discard; 100% hydration, recent + room temperature
- 2 large eggs room temperature
- 4 tbsp (57g) unsalted butter, softened
- 3¼–3½ cups (390–420g) all-purpose flour
- ¾ tsp fine sea salt
- 1 tsp vanilla extract
Vanilla Glaze
- 2 cups (240g) powdered sugar
- 2-3 tbsp whole milk
- 1 tsp vanilla extract or vanilla bean paste
- Pinch of salt
- Oil for frying
This post may contain affiliate links.
How to Make Sourdough Discard Glazed Donuts
Before you begin, use recent sourdough discard, ideally 1–3 days old. Very old discard can become overly acidic or liquid, which may weaken the dough structure. Make sure your discard and eggs are at room temperature so the dough hydrates evenly and kneads properly.
Activate the yeast (10 minutes)
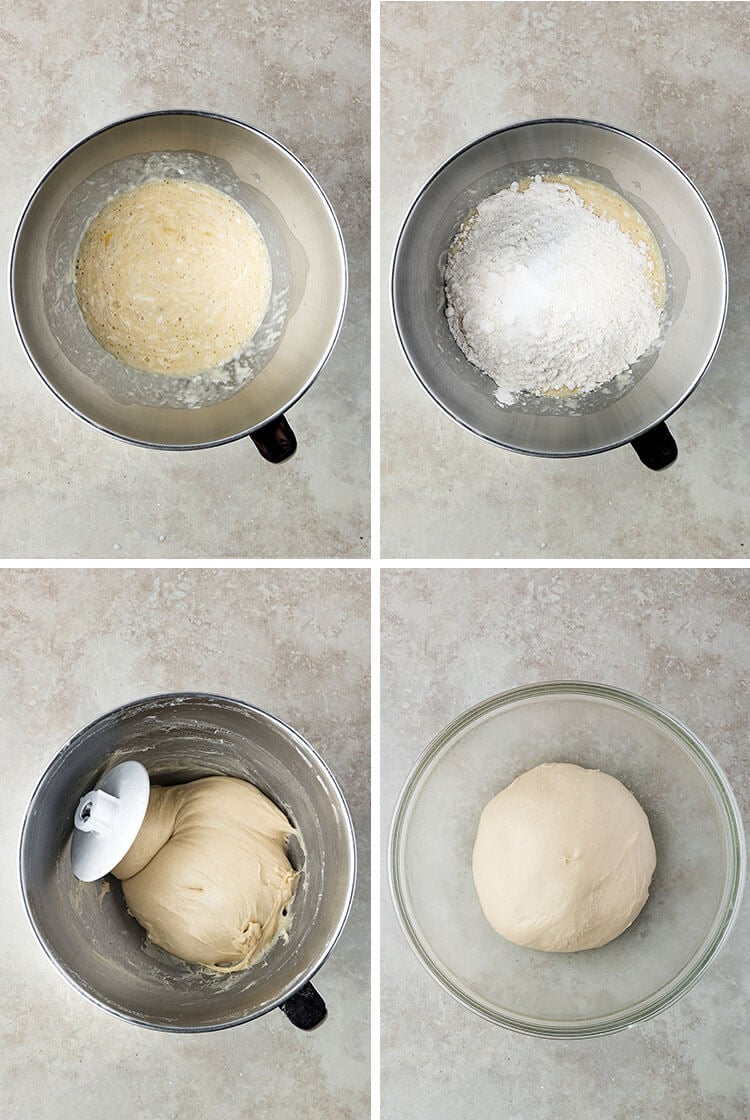
- Mix warm milk, sugar, and instant yeast in a stand mixer bowl. Let sit 5–10 minutes until foamy.
Mix the dough (6–8 minutes)
- Add sourdough discard, eggs, butter, vanilla, salt, and 3¼ cups (390g) flour.
- Knead on medium speed until smooth, elastic, and slightly tacky but not sticky.
- Add up to ¼ cup (30g) extra flour only if needed.
First rise (45–60 minutes)
- Transfer dough to a greased bowl, cover, and let rise until slightly puffed and lighter, 45–60 minutes. It does not need to double.
Overnight cold proof (8–12 hours)
- Cover tightly and refrigerate overnight. No punching down.
- The dough will firm up, relax, and develop flavor.
Next morning:
- Dough should look slightly domed, feel cold and firm, and show small bubbles near the edges. It won’t be dramatically risen but should spring back slowly when lightly pressed.
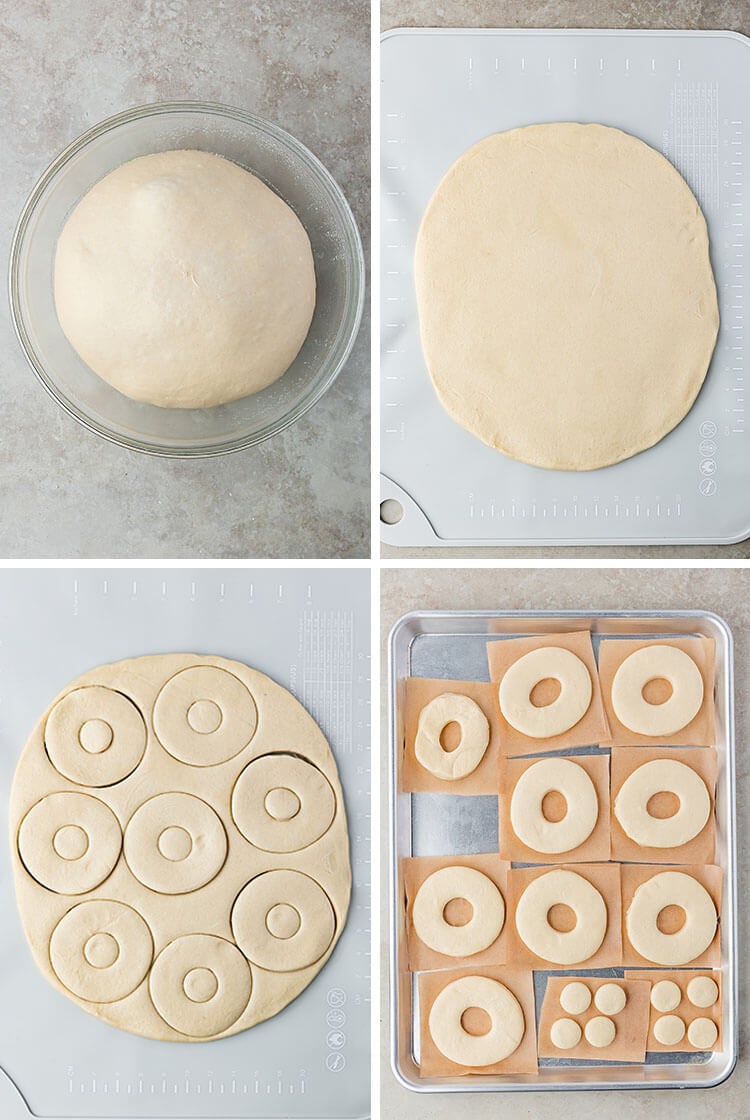
- Roll dough to ½-inch thickness. Cut donuts using a 3-inch cutter and centers with a 1-inch cutter. Place each piece on a parchment square.
- Gather scraps and gently reroll only one time for best texture.
Final proof (45–75 minutes)
- Cover lightly. Donuts should look puffy and airy.
Finger Poke Test:
- Press the side lightly with your fingertip.
- Ready: Indentation springs back slowly and leaves a faint mark.Underproofed: Springs back immediately. Give 10–15 minutes.Overproofed: Barely springs back. Fry these first.
Fry (1 minute per side)
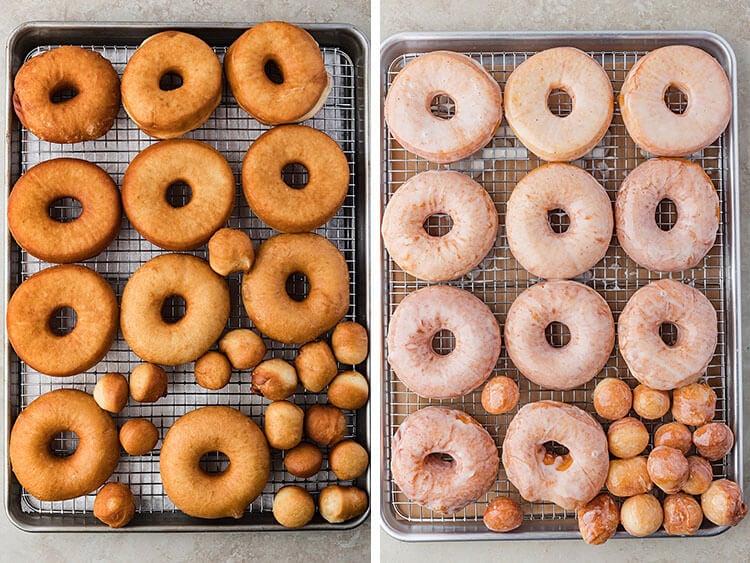
- Heat oil to 350°F (175°C). Fry 2–3 donuts at a time, 1 minute per side until golden.
- Fry donut holes 30–45 seconds. Cool on a wire rack.
Glaze the donuts
- Whisk powdered sugar, milk, vanilla extract or vanilla bean paste, and salt until smooth.
- Dip donuts while warm and let set. For a glossy finish, dip twice.
Be sure to read the notes provided in the recipe card to yield the best Sourdough Discard Glazed Donuts! I’ve even included instructions for a same-day version (no overnight rest).
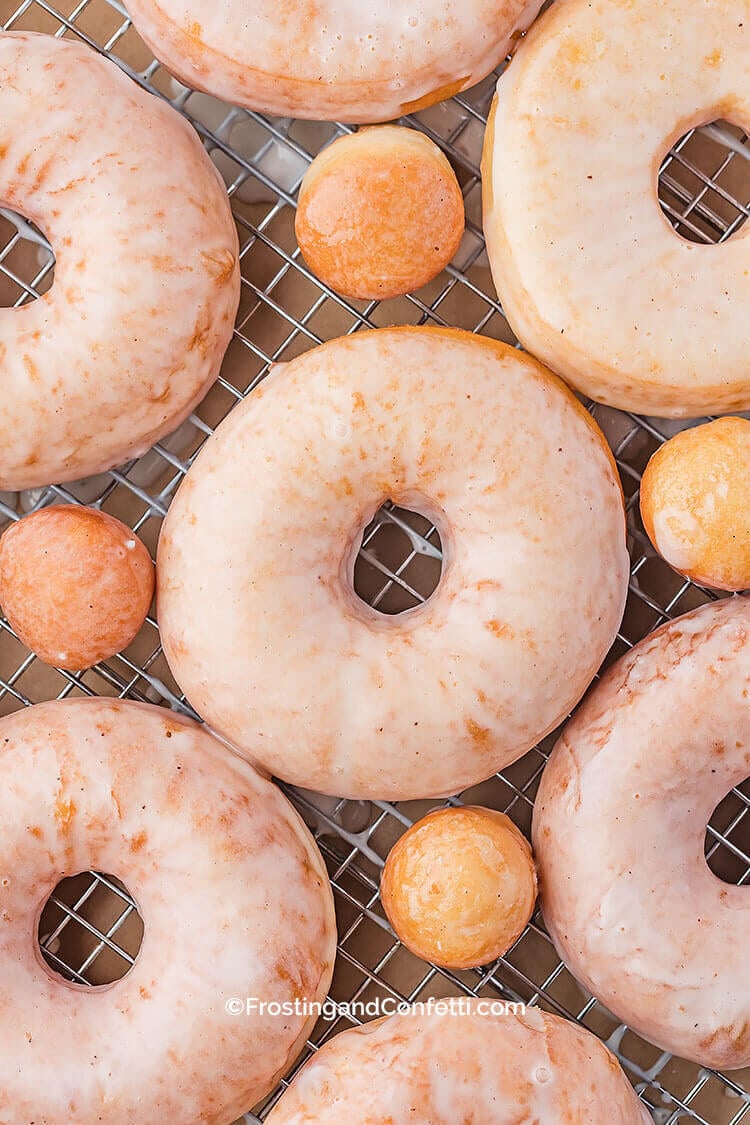

Sourdough Discard Glazed Donuts
Equipment
- Stand mixer with dough hook
- Rolling Pin
- Heavy pot or Dutch oven
- Wire cooling rack
Ingredients
Donut Dough
- ½ cup (120g) whole milk, warm (about 100°F)
- ¼ cup (50g) granulated sugar
- 1½ tsp (5g) instant yeast
- ½ cup (120g) sourdough discard 100% hydration, recent + room temperature
- 2 large eggs room temperature
- 4 tbsp (57g) unsalted butter, softened
- 3¼–3½ cups (390–420g) all-purpose flour
- ¾ tsp fine sea salt
- 1 tsp vanilla extract
Vanilla Glaze
- 2 cups (240g) powdered sugar
- 2-3 tbsp whole milk
- 1 tsp vanilla extract or vanilla bean paste
- Pinch of salt
- Oil for frying
Instructions
- Before you begin: Use recent sourdough discard, ideally 1–3 days old. Very old discard can become overly acidic or liquid, which may weaken the dough structure. Make sure your discard and eggs are at room temperature so the dough hydrates evenly and kneads properly.
Activate the yeast (10 minutes)
- Mix warm milk, sugar, and instant yeast in a stand mixer bowl. Let sit 5–10 minutes until foamy.
Mix the dough (6–8 minutes)
- Add sourdough discard, eggs, butter, vanilla, salt, and 3¼ cups (390g) flour.
- Knead on medium speed until smooth, elastic, and slightly tacky but not sticky.
- Add up to ¼ cup (30g) extra flour only if needed.
First rise (45–60 minutes)
- Transfer dough to a greased bowl, cover, and let rise until slightly puffed and lighter, 45–60 minutes. It does not need to double.
Overnight cold proof (8–12 hours)
- Cover tightly and refrigerate overnight. No punching down.
- The dough will firm up, relax, and develop flavor.
Next morning:
- Dough should look slightly domed, feel cold and firm, and show small bubbles near the edges. It won’t be dramatically risen but should spring back slowly when lightly pressed.
- Roll dough to ½-inch thickness. Cut donuts using a 3-inch cutter and centers with a 1-inch cutter. Place each piece on a parchment square.
- Gather scraps and gently reroll only one time for best texture.
Final proof (45–75 minutes)
- Cover lightly. Donuts should look puffy and airy.
Finger Poke Test:
- Press the side lightly with your fingertip.
- Ready: Indentation springs back slowly and leaves a faint mark.Underproofed: Springs back immediately. Give 10–15 minutes.Overproofed: Barely springs back. Fry these first.
Fry (1 minute per side)
- Heat oil to 350°F (175°C). Fry 2–3 donuts at a time, 1 minute per side until golden.
- Fry donut holes 30–45 seconds. Cool on a wire rack.
Glaze the donuts
- Whisk powdered sugar, milk, vanilla extract or vanilla bean paste, and salt until smooth.
- Dip donuts while warm and let set. For a glossy finish, dip twice.
Notes
- Using sourdough discard that’s only a few days old will give you the best dough consistency. Very old discard becomes more acidic and watery, which can weaken the gluten structure and make the donuts rise unevenly.
- Keep your discard and eggs at room temperature before mixing. Cold ingredients tighten the dough and make it harder for the mixer to knead everything smoothly, which can lead to a tougher texture.
- Cold dough is much easier to roll and cut. This is one of the biggest advantages of the overnight method. The chilled dough stays firm, doesn’t stick as easily to the counter or cutters, and holds its shape better during proofing.
- When frying, try to keep the oil temperature between 345–355°F. If the oil gets too hot, the donuts will brown on the outside before the centers are fully cooked. If the oil drops too cool, the donuts absorb more oil and can turn greasy.
- Be careful not to overproof the donuts during the final rise. Overproofed donuts may collapse slightly as they fry and won’t have that tall, rounded look. The finger poke test is the most reliable indicator for this step.
- Dip the donuts while they are warm—not hot and not fully cooled. Warm donuts allow the glaze to cling and set properly. If they’re too hot, the glaze melts right off. If they’re too cool, the glaze won’t spread evenly.
- If your kitchen runs cold in the morning, the final proof may take a little longer. Give the donuts time to look airy and lighter before frying, even if this means going to the upper end of the time range.
- A spider strainer or slotted spoon makes transferring donuts in and out of the hot oil much easier and reduces the chances of tearing the dough or splashing oil.
- Setting the freshly glazed donuts on a wire rack allows excess glaze to drip off and prevents soggy bottoms. If photographing, a second glaze dip gives the donuts that shiny, bakery-style finish.
Frequently Asked Questions
Can I use fed sourdough starter instead of discard? Yes, but it should still be room temperature. Fed starter may make the dough slightly more active, so proofing times may shorten. Can I bake these instead of frying? You can, but baked yeasted donuts will be more like sweet rolls. Frying creates the classic donut texture. Why isn’t my dough rising much in the fridge? Cold fermentation is slow. The dough will expand slightly but won’t double. This is normal and expected. What oil is best for frying? Neutral oils with high smoke points: canola, vegetable, peanut, or sunflower. Can I freeze the donuts? Freeze shaped, unproofed donuts on a sheet pan, then store in a freezer bag. When ready, thaw, proof until puffy, and fry.Same-Day Version (No Overnight Rest)
You can make these donuts without refrigerating overnight, but the dough behaves differently: Yeast Adjustment (important)- Use 2–2¼ tsp instant yeast (a full packet).
- This compensates for the shorter fermentation window.
- Without the cold rest, the dough may feel stickier.
- Add an extra 2–4 tbsp flour during kneading if needed.
- Shape
- Final rise: 45–60 minutes
- Fry
- Has better flavor development
- Is easier to handle
- Produces a smoother, lighter donut
Related Articles: